|
|
The body starts out as a single ash board, about 8" wide and 7' long. After drying about six months, it's sawn into four boards 20" long.
The pairs of boards, which will become the top and back, are precisely edge-jointed in this fixture in preparation for gluing.
Here's the stack fixture clamping the top and back for one body. With more intermediate frames, it can hold several bodies at once. The key to this fixture is that it holds the boards accurately aligned at the joint while clamping them together.
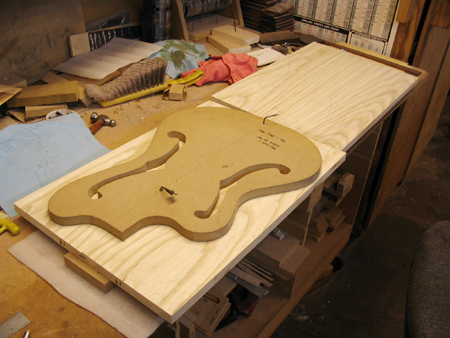
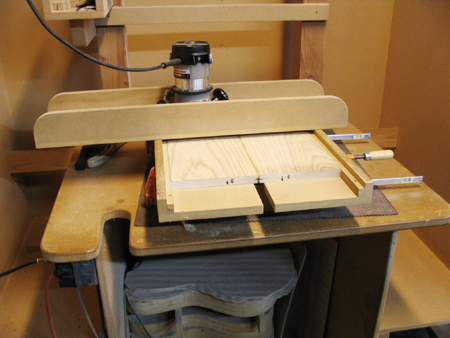
The body master template is used to locate and drill the reference holes into the back and top. All of the fixtures and templates used from here on plug into these same holes, which keeps everything aligned. The perimeter outline is also traced onto the top and back from the master template.
|
|
|
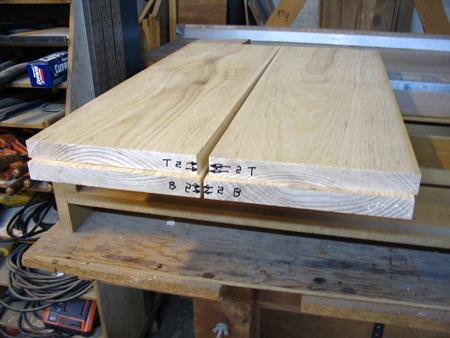
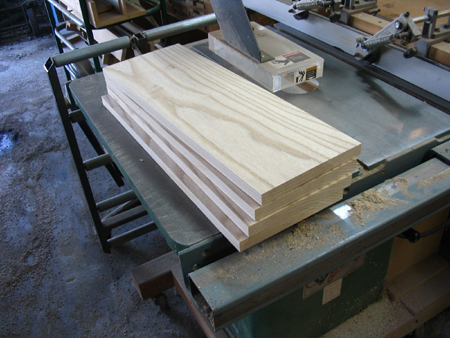
This is how the four boards are arranged into the body, with the grain direction in opposing pairs top-to-back and side-to-side. This
is important to help prevent warpage over time, particularly on a fragile, hollowed body like this. I also arrange the tightest grain
in towards the centerline, which usually looks better through the paint. The four board set is match marked.
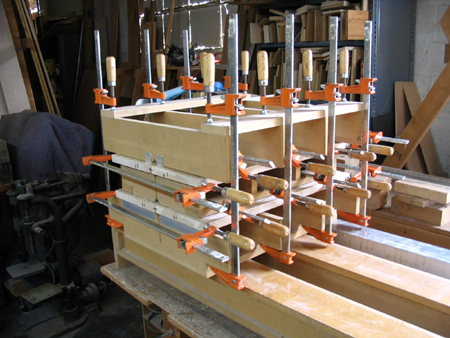
The pairs of boards get edge-glued in a stack fixture. I use Smith's Oak & Teak Epoxy for
this and all other structural joints. The rack on the right holds the boards edge up for application of the epoxy.
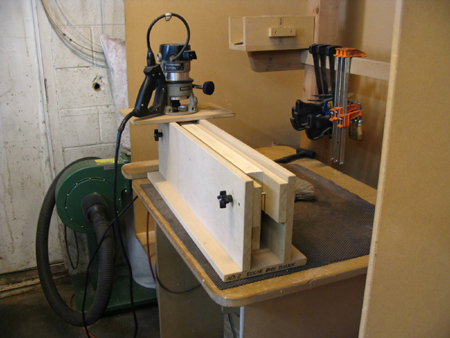
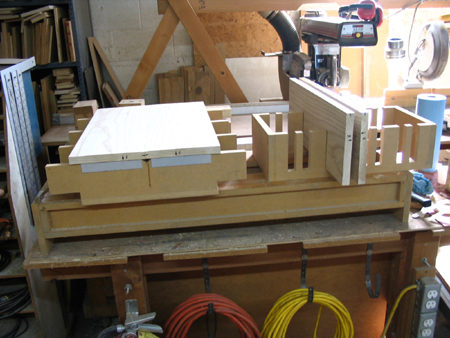
After the epoxy is cured, the top and back boards go into this special surfacing fixture. The router on the wide bridge-type base flattens the top and back surfaces. It's slow, but very accurate and nearly foolproof.
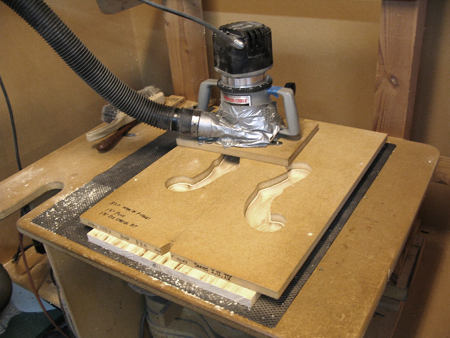
Here's the first in a series of routing templates used to rout out the internal chambers in the inner surfaces of the top and back. Two steel dowel pins in the template are plugged into the reference holes to line it up. This operation cuts the deep scoops that form the inside chambers of the F-holes. The router has a collar on its base that follows the shape of the template.
|
Next Page..
|